
For over a year now, mechanical keyboards have been such a fun hobby for me to indulge in. Although I’m completely satisfied with the Bauer I had commissioned back in May, I’ve always wanted to learn how to solder and put together a keyboard myself. With the Chimera65 fulfilled and just sitting in my closet, I decided it would be a good time to finally learn how to do just that. In addition to my first time soldering, I decided to try lubing and filming the switches as well. Because I didn’t want my first build job to be on a premium board, I looked around and compiled the following list of items for a test build:
Kit — Practice 65 v2 Keyboard by Cannon Keys
The Practice65 v2 is a perfect starting point for anybody looking to start soldering their first keyboard. It includes a Savage65 PCB, FR4 plate + bottom, and the screw hardware — all you need to have a barebones keyboard! Not too bad considering its $47.99 price tag.

Switches — Gateron Silent Inks by NovelKeys (modded with TX 65g springs + Krytox 105, Krytox 205g0, and TX Switch Films)
I considered using budget switches in this spot, but since the Practice65 could function as a full 65% board, I figured I’d put in a switch I’ve always wanted to test out — NK’s Gateron Silent Inks. Part of the very popular Ink line, these silent linears lubed with 205g0 would be the perfect choice to not disturb my wife during late night gaming sessions. I also decided to spring swap to 65g TX springs lubed with Krytox 105 and add clear TX switch films to experience the process of putting those on.

Stabilizers — Transparent Gold Plated V2 by ZealPC (modded with Krytox 205g0 and dielectric grease)
These Zeal stabs were leftovers from the Bauer build, which had a 7u spacebar. I had a 6.25u wire leftover, so into the Practice65 it went. I was determined to do a split backspace build (as I’m fond of a uniform 1u top row!), so I only needed 2x 2u stabs for the enter and left shift keys. I watched a few videos to see how the stabilizer was constructed, and eventually found out how to put it together properly. More 205g0 went into the housings and dielectric grease went on the wire.

Keycaps — GMK White on Black by Drop
I nabbed a set of the classic GMK WoB from Drop in March 2020 that had since been unused. This build was a perfect excuse to open up the plastic wrap and experience that German ABS goodness.

Time to Build
The first thing on my list was to lube and film the switches. Using the handy Kiiboss MX Keyswitch Opener, I painstakingly opened 70 Silent Inks and separated the top housing, bottom housing, stem, and spring.

The QLAVIER x Switchmod Lubestation was helpful in keeping things orderly, though I have to admit that the stem holder was not as useful in practice since I was removing each one to lube.
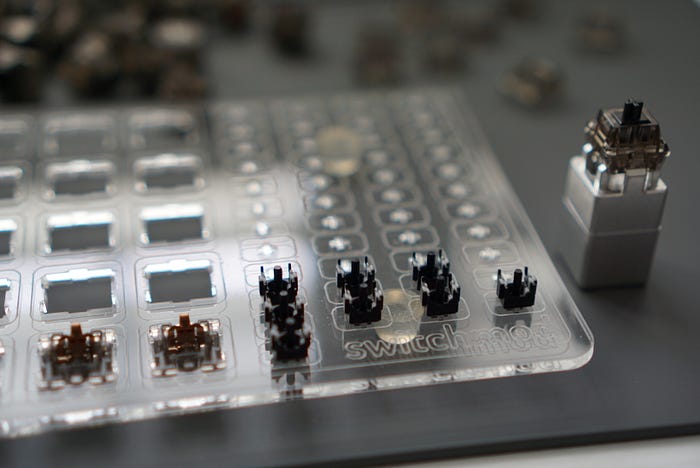
The TX Switch Slider Picker, on the other hand, was tons useful and helped me manipulate each of those pieces during the process.

For the switches, I used a size 0 brush along with 205g0 from Switchmod to go over every single bottom housing and stem. I watched quite a few videos to note what parts exactly should be lubed, though admittedly I wouldn’t know any difference as this was to be my first time doing it. The trick I often hear is “with lubing, less is more”, so I made a conscious effort to keep the lube light and consistent for each switch.

For the springs, I decided to try bag lubing them in a ziplock bag. I counted out 70x 65g TX springs and tossed em in the bag along with 5 drops of Krytox 105 oil. I added some air to inflate the ziplock and then shook it around for ~5 mins or so.

After lubing the bottom housings and springs, I added a single TX film to each bottom, followed by setting a TX spring in place. I then grabbed each stem, lubed it, and put it on top of the spring. The stem goes in a certain orientation, so I was mindful to keep them facing the correct direction.

Once the stem was placed, the switch was ready to be capped by the top housing. Altogether, the modding process took quite a bit of time for me — I want to say it clocked in ~4 hours total to lube, film, and spring swap 70 switches.

With the switches all set and ready to go, the next thing on my list was to test the PCB. I opened up VIA, switched to Key Tester mode, and actuated each of the spots with metal tweezers to ensure everything was functioning properly. Luckily, this went with no hiccups and was actually pretty simple.

With the PCB tested, I grabbed 1x 6.25u and 2x 2u stabilizers and lubed each part of the housing with 205g0. It was a bit easier to do vs the switches, as these parts were mostly flat. Once that was done, I took each stab wire and dipped it into the dielectric grease tube. I added a little bit more on each curve as well, as this was the part that would be snapping into the stab housing.
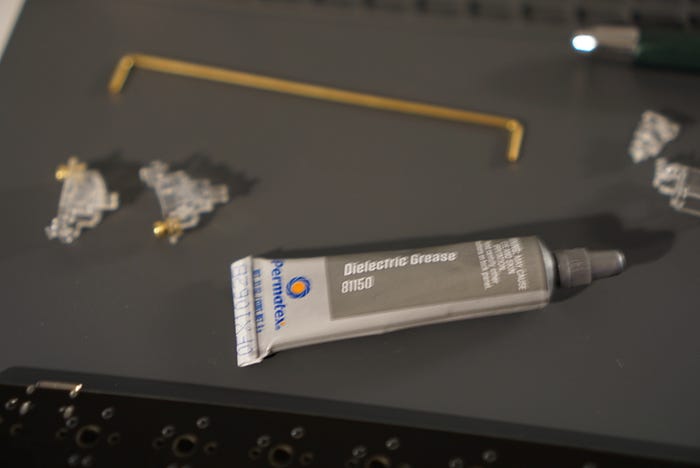
With the stabs lubed up, I screwed each stabilizer into its proper spot. The spacebar stab had the wire facing north, and the 2u left shift and 2u enter stabilizer had the wires facing south.

I did a quick test of the stabs using keycaps from a CoolerMaster keyboard I had laying around. They sounded pretty decent to me — no discernable rattling and silky smooth.
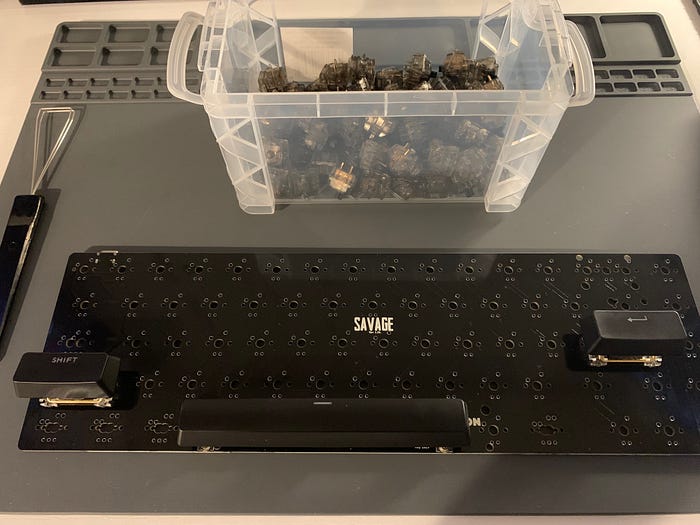
The plate came next, which sat on top of the stabs and PCB. I inserted the switches through the plate and into the PCB, ensuring both pins for each switch made it through the PCB and that the switches were flush against the plate.

With the switches and stabilizers in place, I had no more excuses to delay the scariest part of the build — it was time to solder.

Using the TS100 soldering iron, I set the temperature to 330 degrees and pulled out my 63/37 Kester solder. I set my sights on the top left of the PCB and located the two pins I would be soldering to the pads. Gently touching and holding the chisel tip to both the pin and pad, I waited a few seconds, fed the solder into the heated connection, removed the solder, and then finally removed the iron. Every few switches, I would wipe the tip of the soldering iron on a metal sponge to ensure it was clean.

What seemed daunting and intimidating could not have been more simple! I repeated this for the rest of the board, snaking down from row to row. I opened up a window and used a handheld fan to blow some of the soldering fumes away from my face and before I knew it, I was done! Taking my time and admiring my work, the entire soldering process took me about 30 minutes. I’m sure an experienced builder could do the same 65% format in less than half that time.
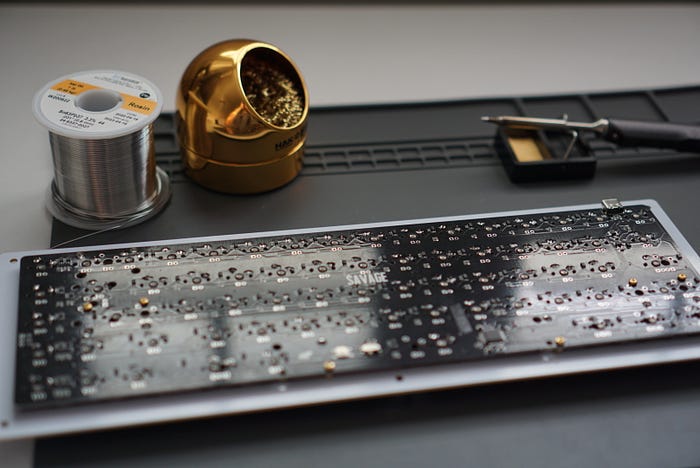
With the soldering job done, I went back into VIA to re-test the PCB to make sure I didn’t break anything. Everything worked perfectly, thank goodness.

Nearing the end, the next step was to assemble the rest of the Practice65. I took the FR4 bottom and screwed the top+PCB into place with a hex screwdriver.

With the keyboard fully constructed, the last thing I needed to do was pop the keycaps into place. The hardest part about putting keycaps on a 65% has got to be making sure you have the right profile for the macro column on the far right side.
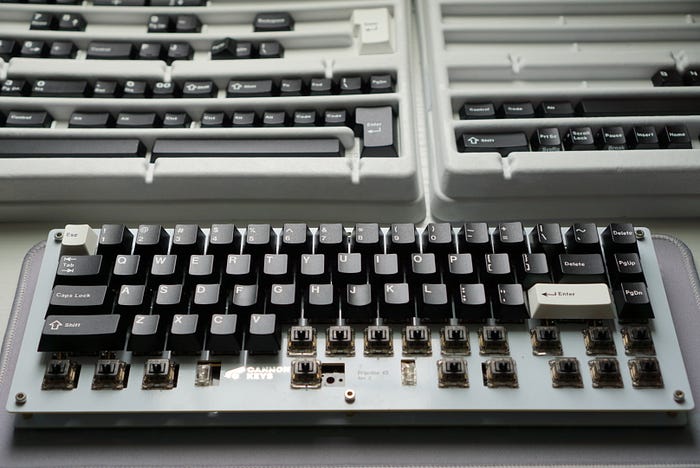
Overall, I’m extremely pleased with my work and soooo glad to have built a keyboard all by myself! I’ve been using the keyboard for the past week now and the switches feel amazing and are super quiet. I definitely recommend all mechanical keyboard enthusiasts to learn this useful skill — if I can do it, you absolutely can!

Finally, here are a few shots of the completed build:


Having used the keyboard for a week now, I am quite happy to report that I have not yet had any issues with the Practice65. Though I greatly prefer the Bauer typing experience as a whole, I still think it was well-worth the time, money, and effort to put this build together 100% on my own. I feel very confident that I can now start putting together the Chimera65 and a few incoming kits in the next coming months!
Thanks for your time and attention in getting to the end of this blog post! I had a great time documenting the build and putting my thoughts down in words. The next one should be a “chimeric” build…
